Tuesday, January 27, 2009

No Asian Chicken For You! and Winter Beauty

I made an Asian dish for dinner last night. It is my own recipe, or rather, a combination of some of my favorite Asian chicken recipes (that makes it my own original recipe, doesn't it?). It has a rich, satiny sauce infused with the flavors of garlic and onion. It's spicy, but not too spicy. The chicken is incredibly tender and delicious. Vegetables round out the flavors and make it a complete and healthy meal served over steaming rice. I made it just so I could share it right here with you. I even photographed all of the ingredients and preparation of this masterpiece. You know what I forgot to do? Take a picture of the finished dish! So, while I had planned to post the recipe today, it will have to wait until I make it again. No Asian Chicken for you!

Winter is still going strong here in Michigan, as it will be for another month or two. The temperatures have remained well below freezing since mid-December and the snow remains nearly a foot deep anywhere that hasn't been plowed or shoveled. Quite frankly, it's depressing.

Everything looks so dead this time of year. I miss spending time outside. I miss the flowers and the green grass. I miss the leaves on the trees. I miss having the windows open. After the novelty of the first snow wears off, it's hard for me to find anything beautiful about winter.

Saturday was the first day that the sun appeared in quite a while and I did find something beautiful. Almost sculptural, in fact. I was looking out the living room window and saw some spectacular icicles contrasted against the brilliant blue sky. I grabbed my camera and took a few pictures.


It's not enough to make me stop counting the days until spring, but it does make me appreciate the beauty of winter just a little bit.

Monday, January 26, 2009

More Woe

I haven't posted anything new in a few days because I've been under the weather. My husband and I both seem to be fighting a stomach "bug". It's not as bad as having the flu, but feels more like a perpetual hangover! I haven't had any alcohol in over a week, so I know that's not what it is, but that's what it feels like.

Yesterday, though, I was feeling more energized and managed to get a little bit done around the house. I hadn't planned to do any cleaning in the bathroom (the same bathroom that mocked me with hard water and mildew stains last week), but I had no choice. My daughter was getting ready to take a shower, so I took her clean clothes and set them on the vanity for her. The vanity is far enough away that they won't get splashed or dripped on as she is getting in and out of the shower. It's also where the electrical outlet is. The one where I have an Airwick oil warmer plugged in. Do you see where this is going yet?
Way back when I started this blog I told you how obsessed I am with scents and making my house smell good. I'm pretty picky about what scents I like and what scents I don't, but I've found that I like the Airwick Aqua Essences Vanilla Passion scented oil. It's simple to use, you click the bottle of oil into the warmer, plug it in and it does it's job. Usually.

There is a wick that absorbs the oil from the bottle and extends into the warmer to disperse the scent. The wick on this particular bottle was frayed a little bit and a portion of it didn't get inserted into the warmer, but instead bent downward. I didn't notice this when I plugged it into the wall. The "bent" portion wicked up the oil and caused it to drip down the side of the bottle and onto the vanity beneath the outlet. The vanity is white, the oil is fairly clear, I just didn't notice that there was a puddle of it right where I set my daughter's clothes.

For some reason, I decided to pick the clothes up and move them right after I had set them down. I noticed some smudges on the vanity and ran my fingers over them. Oil, hmmmm, why would there be oil here? Lightbulb! The oil warmer must be malfunctioning!

The oily clothes were replaced with non-oily clothes and the vanity was scrubbed within an inch of it's life to get rid of the residue and vanilla scent. I'm beginning to think this bathroom is out to get me.

Woe is me, again!!

Tuesday, January 20, 2009

Passion In The Kitchen

Kitchen tools are awesome, aren't they? Can you ever have too many? I guess you could say that you have too many if you don't have room for all of them. I would rather just say my kitchen needs to be bigger! I love accessories and gadgets of all sorts and have a serious passion for buying them. I can honestly say that I do use most of the ones I own. Yes, I said most. I've purchased a dud or two, but I really do love to use the things I have.


This is one of my favorites. It's a straight blade pizza knife, but it's good for so much more than pizza. It's great for cutting bar cookies and other square treats and getting them all the same size. It's not something I use on a daily basis, but when I need it, it's great to have. I made cereal bars today and it was so much easier to cut them into squares using this knife than a regular knife.


I'm also very fond of the kitchen items I've inherited and the vintage items I've collected. These green glass dessert plates belonged to my great grandmother. They're fairly fragile, but I try to use them as often as I can anyway. I would much rather use the things that I love than have them sitting in a cabinet unappreciated.


It just wouldn't be the same to toss a handful of nuts into the food processor. I love to use the hand cranked nut grinder, or enlist one of my kids to do the job for me. It's only drawback is that you can't adjust the size of the grind. But for finely chopped or ground nuts, it's my first choice. My mom has one just like it and so did my grandma. I bought this one at an antique show. It got quite a workout this past Christmas.


This is a handy vintage gadget, too, and it's another antique show purchase. Do you know what it is? It's a jar opener. The gears allow it to automatically adjust to the size of the jar lid. There are little "grabbers" that grip the edge of the lid and the handle gives you extra leverage. I've yet to encounter a jar I couldn't open with this little guy.


I could go on and on and on........

Monday, January 19, 2009

A Tale of Woe

This is no secret to anyone who knows me, but I'm a germophobe. I'm also a little bit obsessive/compulsive. Nice combination, eh? I can't stand dust, dirt or grime of any kind. I may, in fact, be keeping Mr. Clean, Windex, the Swiffer company and half a dozen others in business. I'm a sucker for a good cleaning product.

I live in a small town where we have municipal well water. What does that mean? Basically we have several giant wells that provide water to the whole town. It's not necessarily a bad thing. The water is treated so it doesn't have the iron smell that some well water has, but it still has an especially high mineral concentration. Put simply, we have really hard water.

This brings me to my lastest adventure in cleaning. Try as I might, I can't seem to keep the white tile and white grout in the shower looking, well...........white! So armed with determination, I went to the supermarket in seach of new cleaning products to add to my arsenal. I wasn't going to let the hard water and mildew get me, it was time to get serious!

As soon as I hit the cleaning aisle in the store, I fell in love! I found out that Libman makes a product that is a sponge mop on one side and a scrub brush on the other. Just the idea of a scrub brush at the end of a handle long enough to reach the corners and ceiling of the shower had me giddy! Add the ability to scrub floors without getting on my knees.......that baby practically jumped into my cart!

On to cleaners. I needed something that meant business. No wimpy little spring flower scented cleaner was going to bust through the hard water stains and the nasty mildew that was flourishing just out of my reach. I needed something powerful. Tilex gives me a major migraine every time I use it, so that was out. I considered Scrubbing Bubbles Mega Shower Foamer, but it said nothing about mildew or hard water on the can, so I put it back. Comet Bath Spray looked promising, so I grabbed a bottle and headed for the checkout.

Here's where things started to go down hill rapidly. I started my cleaning by taking down the white vinyl shower liner and putting it in the washing machine with some towels (the towels help "scrub" off any soap scum, they get washed separately afterward). No problems there, I've done that a hundred times without incident. After the wash, I put the liner and towels in the drier on the no-heat setting for about 20 minutes so I wouldn't have to carry a dripping shower curtain up the stairs (also SOP).

Next I doused the walls and ceiling of the shower with the Comet Bath Spray, waited five or ten minutes and scrubbed with my new Gator Mop. Not too bad, I could reach the ceiling and corners without a problem, but the stains were not budging. Hmmmm. Maybe another application of cleaner? Did that, scrubbed again, not much better.

Back to the laundry room. I opened the drier and pulled out the almost dry shower liner. All traces of soap scum are gone, it looks clean but I have a rusty spot in the drier (only several years old, by the way, and leaving spots on our clothes from time to time!) that has made a rust pattern all over the white curtain. Nice, it looks like an abstract orange fern pattern that you might have seen in the 70's. I don't have another liner so I'm stuck putting this monstrosity back up. It's an extra long liner that I can't get a replacement for at any store in town. I've had it! Enough for one day.

The next day I'm back at the supermarket to pick up a different cleaner. One of my online friends recommends the Scrubbing Bubbles Mega Shower Foamer, so I get that. I follow the instructions. Spray, wait, rinse. Better than the results with the Comet, but still not perfect.

Now I'm getting mad so I search through the bathroom cabinet looking for another cleaner. Have I overlooked something? It seems I have. I have a bottle of something called Zap. It refers to itself as a "Tile and Grout Restorer". This sounds promising! You can dilute it or use full strength on tough stains. Exactly what I'm looking for! I make sure the previous cleaner is completely rinsed off and then I attack those tiles with the Zap full strength.

I've read the bottle, but I don't see the active ingredients listed. However, I'm pretty sure number one on the list is muriatic acid. I've used it before so I know what it smells like and I know what it feels like to get it on your skin. Now I'm coughing and gagging, little spots on my arms are burning, but I'm finally getting rid of the stains. A little scrubbing, a lot of rinsing and my shower finally looks clean.

'What an incredible product', I think to myself. Sure, it may be create some nasty fumes, but if I use a light spray of it everyday after everyone is done showering, I may never have to fight stains again! So that's what I did. For the rest of the week, I lightly sprayed the tiles with the Zap and it kept everything looking white. I was so happy until I noticed that it disintegrated the arm that holds the hand-held showerhead. That sucker just crumbled away into little pieces and left the hand-held sprayer dangling. What remained of the fitting looked chalky and pitted, like an ancient artifact. Until I could get to the store and get a new shower head, we'd be stuck using a rubberband to hang this one off the "artifact".

My husband picked up a new showerhead that's even better than what we had. It's got the regular wall mounted head and a hand-held spray unit. They can be used simultaneously or separately. Both have multiple spray and massage settings and they produce a lot more water pressure than what we had.

So in the end it all worked out, but I have to say it. Woe is me!!


Friday, January 16, 2009

The Artist

I love the idea of owning a piece of original artwork. An oil on canvas, perhaps, or a delicate watercolor painting. Something that evokes a memory or an emotion when I look at it. Am I asking too much? I must be, I've yet to find exactly what I'm looking for.

I'm not an artist so I can't create it myself. Or can I? The only thing I can draw is stick figures, and even those aren't great. I can't paint either. But my computer can do both! If I can take a picture of something, I can turn it into a drawing or painting with a few clicks of my mouse. I can even send it to a photo processor who will print my creation on any size paper I like. Last year I turned a photograph I had taken of the ocean into a "painting" and had it printed on large paper. I framed it and gave it to my parents for Christmas.
As with my last photo project, I used the old, outdated software that came with our Dell desktop computer five or six years ago. Here are some examples of how my pictures turned out.


I think landscapes turn out especially nice. This is a photo of my son and his girlfriend sitting on the pier overlooking Lake Huron.


Portraits work well, also. I wasn't looking for a tight, focused result here, I wanted it to be soft. This is my daughter peeking out from behind a honeysuckle.

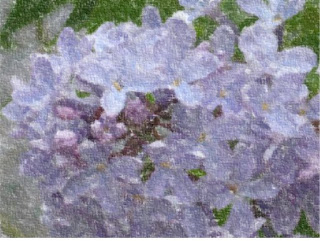
Close-ups of flowers and other objects can be really interesting. A simple shot of a lilac looks very "impressionist".


The grapes don't impress me as much as the lilac. It might make a nice print for the kitchen or an attractive wine label, though.


I had to see what I could do with an old black and white photo, too. I used an effect that was supposed to resemble a pencil sketch. I think it looks a bit more like a painting, but I still like it. This is my husband and his two brothers when they were children.

The whole idea, really, is to use the photographs of the people, places and objects you love to create artwork that you will enjoy. I should add that all of these pictures look better when viewed larger. I think they lose some of the paint and pencil detail at this size. Even so, you get the "picture"!

One final note: If you're feeling especially "artsy" and want to create digital paintings and drawings without using photograph, click here and explore your inner Rembrandt.


Thursday, January 8, 2009

Photo Fun

Have you done anything with those holiday pictures yet? Me neither. I have a terrible habit of taking pictures and then just letting them hang out on my computer for months before I do anything special with them. Today, though, I felt like doing a project. I didn't stick to holiday pictures, but this project is fun with any pictures you have.

There are plenty of places that will turn your photos into magazine covers, but you don't need to pay anyone to do it for you. It's pretty easy to do it yourself. I don't have any fancy schmancy photo editing software, either. I'm still using the software that came with our first desktop computer. It's antiquated, but I know how to use it. The computer itself melted one day a few years ago, but that's another story. If you have software that will let you add text to pictures, you're good to go. Because I don't know what editing package you'll be using, I can't give you any specific instructions, but I can give you some examples of what I've done.

I took this picture of the frozen shore of Lake Huron in Lexington, Michigan. You can't even imagine the temperature with the wind coming off the lake.


I love this one! Thanks to my father in law, I have some wonderful old family pictures. I wasn't sure how I would feel about a project done solely in black and white, but I'm so glad I tried it.


Ok, I may have gotten a little carried away with this one, but what else can you do with pictures like this? I took this picture at an outdoor summer concert. Nice view, eh?


Now, what do you do with the magazine covers that you've created? You could, of course, print them on photo paper and frame them. My favorite way to use them is to print them on magnetic sheets (available at craft stores) and make refrigerator magnets. If you scale down your creations, you can get six smaller magnets or four larger ones per sheet. Whatever you do, have fun!

One last bit of Willoughby wisdom - Take a lesson from me and be sure to back up all of your digital photos on a flash drive or a disc. We lost several years of precious family photos because of a crashed computer.

Tuesday, January 6, 2009

Onions And A Little Bit Of Bling

Frequently, when I cook something with onion in it someone will say to me "Willoughby, these onions are so evenly diced, how do you do it?" Ok, that never really happens. But I do have a great way to dice an onion, even if you don't have the knife skills of a chef. Go get your onion, your knife and your cutting board. I'll wait.


And while I'm waiting, I would like to thank my son's girlfriend for demonstrating this technique for me. I could hardly cut an onion and take pictures at the same time, so I really appreciate her help. She took her ring off for the demo, but I wanted you all to see it. No, it's not an engagement ring, they're only teenagers!!


Start by placing the onion on the cutting board so that the root is on one side and the stem end is on the other.


Now cut the onion right down the middle between those two points. Remove the papery skin from each half.

Place one half on the board, cut side down (set the other half aside). Holding the top firmly, place the tip of your knife close to the center and cut downward. Rotate the onion slightly and repeat. Continue cutting all the way around the onion. Basically, you want cuts radiating out from the center all the way around the onion.


Next, angle your knife at about a 45 degree angle and slice inward about 1/4 inch up from the bottom. Place the knife 1/4 inch higher than the first cut and slice inward again.


Do this all the way around the onion until you have a square "core".


Turn the core on it's side and slice straight down in 1/4 inch slices. That's it, you're done!


If you want a finer dice, hold the handle of the knife in one hand and place your palm flat on the straight side of the blade and, using a rocking motion, chop the onions until they are the size you want.

Your onions will be so nicely diced that people will comment on it! Well, maybe not.

Monday, January 5, 2009

Just For Fun

Look up! Not at the ceiling, at the top of the screen. Do you see where it says "Next Blog"? Click it! Wait, finish reading this first! But, seriously, when you're done, click it. It will randomly choose another blog for you to view. I'm sure some of you already knew this, but I'll bet some of you didn't. I've been looking at tons of new blogs over the last few days, and it's a riot! Like I needed another reason to spend more time in front of the computer!

Thinking Spring


Is it too early to be thinking about spring? Probably, but I can't help it. I know you're thinking, "Didn't you just take down the Christmas wreaths yesterday?" Yes, I did, but what's that got to do with it?

I'll admit, I don't have much of a green thumb. Or maybe I do. I just get lazy about taking care of my plants once the novelty of them has worn off. I had some beautiful flowers, herbs and tomatoes last year. I sort of let them go by the end of summer, though.

See how pretty they looked early in the season?


This year, I'm turning over a new leaf (pun most definitely intended)! I'm going to try to keep my plants looking beautiful all summer long. In fact, my daughter and I have decided to make a project out of it, complete with photo journal. We had a long talk about it while sitting in the parking lot before school this morning, figuring out what sort of flowers and vegetables we want to grow. The minute I got home I went to the Burpee website to look at vegetable seeds. The choices are overwhelming! I haven't placed an order yet, I need to consult with my assistant before I do that.

I have a few easy garden projects in mind that will be fun for both us. I'll be sharing them here, too. I'm also planning to find some new recipes for the vegetables and herbs we'll be growing. I can hardly wait!

Sunday, January 4, 2009

Sunday, Back To Work and Farewell to Christmas

It's Sunday and I'm back to work. Well, calling it work is a stretch, I suppose. For me, Sunday is ebay listing day. I had taken a break over the holidays, but I felt ready to get back to it today. I listed 15 items earlier this afternoon so we'll see how it goes. I will probably add some more during the week, I've got more inventory than I have the space for! If you want to check it out, go to http://shop.ebay.com/merchant/bruce1115.

Today was also the day we officially said farewell to Christmas at the "Willoughby" house! The Christmas tree has been down since December 27th, but today was the day I took down the wreaths on the windows and doors. I love Christmas, but I was ready to pack it all away until next year. How long until I stop finding pine needles on the floor? I'll have to get back to you on that one!

Friday, January 2, 2009

Random "Scentimental" Tips

I just can't resist adding a few more "Scentimental" tips before I move on to bigger and better (or at least different) subject matter. I hope you'll find them useful!
  • Extra special gift giving - Store your tissue paper in a plastic storage container with a tight fitting lid along with a few scented votive candles. Be sure there is a layer of plastic wrap or foil between the candles and tissue so you don't end up with stains. After a week or so, the tissue paper will take on the smell of the candles. Use your scented paper in gift bags or boxes (not recommended for food gifts).
  • Having a party or an open house - You can't use this tip to disguise a dirty bathroom, but you can make a clean bathroom seem extra fresh before company arrives. Fill the bathroom sink with water and about a half cup of liquid cleaner. Let it sit until just before your guests arrive, then drain and rinse the sink (this works to make toilets fresh, too. It may take a few flushes to get rid of the bubbles.). Realtors use this trick when showing a house. FYI - I've read that lemon is the most universally enjoyed scent of cleaners.

Another "Scentimental" Project

I love this project. It's fun, fast, easy and inexpensive. It's also a great way to get the most out of your scented candles. What more could you want?

We're going to make scented tarts for wax tart burners. It doesn't matter if you have an electric model or one that uses a candle to melt the wax. The tarts we are going to make will work in either style.

To begin, preheat your oven to 450 degress. I know, you're wondering why we need the oven and why it has to be so hot. We are going to use the oven to melt the wax, and the reason it has to be so hot.....well, it probably doesn't need to be quite that hot but I said this was going to be a fast project and heat equals speed!

Ok, now you'll need scented candle remnants. You can use stubs of votives, pillars, or my favorite, jar candles that still have an inch or so of wax in the bottom but won't burn anymore.

Cover your work surface with several layers of newspaper. Using a blunt tipped knife, gently cut or break the candles into small chunks. If you are using a jar candle, gently push the tip of knife into the wax and twist slightly (see bad picture below!). Be extremely careful not to break the jar. And please, please, please don't cut yourself! Discard all wicks and wick bases.


Now comes the fun part! You'll need your wax chunks, a muffin pan and foil baking cups (I call them cupcake liners). Do not use the paper ones! Separate the foil baking cups from their paper dividers and add a small handful of wax chunks to each cup. Place the cups into the wells of the muffin pan. Why didn't we fill the cups after putting them in the wells? Because then we might get little bits of wax on the muffin pan and we don't want to do that! In my example photos I'm only making four tarts because that was all the wax I had chopped up.


Now, turn the oven off. That's right, turn it off. It's plenty hot and I think it's safer that way. Using oven mitts, place your muffin pan in the oven and close the oven door. Leave it alone for about 5 minutes, then take a peek. Is the wax melted? If it is, remove the pan carefully (again, using oven mitts) and set it aside to cool. If not, shut the door and continue checking every minute or so until the wax is completely melted. Never leave the kitchen while the wax is in the oven. Safety first, ok?

Leave the pan undisturbed for about 40 minutes. Once the wax has become completely opaque, it's set. Remove the baking cups from the wells and peel them off of the wax. There you have it! Perfect wax tarts to use in your burner!


**Variations - This project can also be done using a mini-muffin pan. Again, be sure to use foil liners, not the paper ones.

For a really fun twist, you can use the mini tarts with the full sized tarts to mix scents. Cinnamon with vanilla would be nice or blueberry and apple. Just press a finished mini tart into a full sized tart as it's beginning to set. When it has fully cooled, the mini tart will be set in the middle. The scents will mingle as they melt in the tart burner!